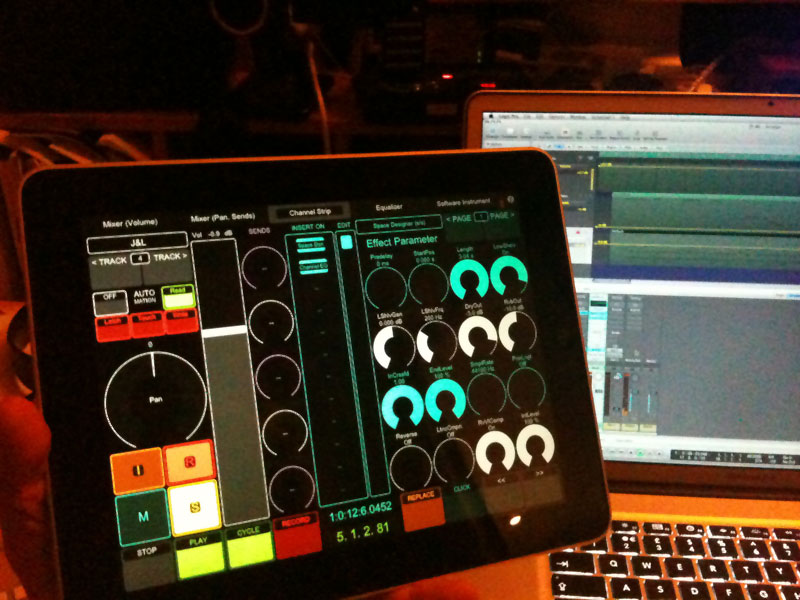
In 4 Easy Steps To Adding A Tablet Controller To Your DJ Set-up, I dove into how to set up and use TouchOSC on your smartphone or tablet in your DJ set-up. While it was a little complex, the end result is quite remarkable.
While the layouts included with TouchOSC are fun and cover a wide array of potential set-ups, part of the fun is being able to make your own customized control layout, and today I’ll show you how easy it is.
Tough luck for Android…
It was in my attempt to make a custom layout for TouchOSC that I found out now why the Android version was free while the iOS version is US$4.99. Apparently the developers at hexler.net have not fully “finished” and “perfected” the Android version. I could understand that, with the wider array of hardware configurations of Android devices combined with the version fragmentation making things probably prohibitively difficult. Still, it sucks for me since my ThinkPad Tablet runs on Android.
Hexler.net is asking for donations to help it fund the finishing of the Android version of the app, so if you really want to see custom layouts come to Android, take a moment and donate US$5. Be sure to drop them an email telling that you want to see the Android app finished, and perhaps give them the name, model, specs, and Android version of your device…
Setting up the TouchOSC Editor
Just a reminder, you can download the TouchOSC Editor from hexler.net. It comes in versions for MacOS, Linux, and Windows (32-bit and 64-bit). What’s cool is that the Editor runs as a standalone program, so no installation required. If you are in Windows, you’ll have to download and install a Java Runtime Environment (JRE) program from the official Java website. Be sure to pick the right bit-version for your version of Windows. So now we’re ready to go…
Creating a layout
When you’re up and running with the TouchOSC Editor, you’ll see how easy it is to build a layout. First, pick if you want to make a layout for an iPhone/iPod Touch or an iPad. Also select if you want the layout in a horizontal or vertical orientation.
From there, you simply right-click (ctrl-click in Mac) on the layout area to add items. Where you place and colour items is up to your imagination, but what you can add is as follows:
- LED – A simple light for whatever purpose you might need it for. You can’t get “EQ level”-style LEDs here, not unless you manage to somehow build one with multiple LED items…
- Label – These simple fields serve as nothing more than a name. If you wish to put labelling on controls you’re adding, this is where you go
- Push button – This is a simple button that works much like you would see on any drum pad. You press the button and it’s on, but when you release it, it’s off
- Toggle button – This is more if you want buttons that truly work as an on/off switch. Press once and leave it on, press a second time and it’s off
- XY pad – A simple square or rectangle where you can move the control up, down, left, right, or diagonal. Ideal for controlling effects
- Fader – Whether you want a crossfader or volume level or whatever you might need a slide fader for
- Rotary knob – When a fader won’t do and it’s a knob you need. Maybe for channel EQs or effects control
- Encoder – This is similar to a rotary knob, but there is no limit on where it can go. While a rotary can only go 0 to 100%, an encoder will rotate to infinity
- Battery meter – Yes, TouchOSC can show you how much power your smartphone or tablet has left. I’m not sure how useful this is with the iOS title bar showing you battery power all the time, but you might have a need
- Time meter – It is as it says. Maybe you’re setting up a control system for a sampler or even your normal decks. With the right mapping you could use this to show track/sample length, remaining time, whatever time information you have access to
- Multis – Multis are simply sets of items. They could be buttons, faders, or the XY Pad. They’re ideal when you want a “set” of items together. Maybe you want to make a multi-band EQ system, or use multi-toggle buttons for your own APC 40-style set-up, or multi-push buttons for your own drum pad
As you add items on your screen, you can designate the size, positioning, and colour. With some items you can also designate the “start” point. So if you perhaps put a fader in to be a crossfader, you might want to start it at the middle as opposed to one side. With the multis you can also designate how many items you want in your grouping.
The OSC and Midi labelling

In the lower left area of the editor you will see two tabs labelled “OSC” and “Midi”. I’ll forewarn you that if you don’t know what you’re doing, leave them on automatic and let the Editor handle the labelling. In many ways you’ll probably be mapping items to your software of choice with Learn functions, so this won’t matter much.
However, in your exploration you might end up wanting to go further, so here are the quick explanations.
The OSC area
The OSC area is where you can designate what OSC message your layout item will send through PureData. Why would you want to control this? It might help you group items together, like if you wanted to set up an LED to work with a Push Button. You might want to set up multiple pages, but put one Time Meter on each page that tells the same time reading no matter what.
Thus you might manually go in and designate each of those Time Meters with the same OSC message.
The Midi area
The Midi area is more where you can designate what Midi function an item might serve. I’m not speaking in terms of a button controlling a deck for instance, but more whether or not an item will send or receive data. In the Var drop-down menu, X corresponds to the item’s current state value. Z corresponds more to a “yes” or “no” designation of the item being the target of a touch event or not. C is about the item’s control colour.
Even to my own technological eyes this is very new, so I’d suggest you start slow and learn as you go. There are several websites and the message forum on hexler.net for help and advice.
Getting your layout into your device
OK, you’ve designed the perfect layout to use at the club, but how do you get it into your device? Cables? iTunes? No, just the sync. This is what I love about the Editor and the app: They made it so easy to move your layouts into the device, even with Apple’s strictness on putting stuff into your iPhone, iPod Touch, or iPad.

Simply press the sync button on the Editor and a window should pop up giving you instructions. Go into your device and start the TouchOSC app. Go into the setting and then into the area where you pick from the included layouts. You should see a button labelled “Add”. Go in there and you should see your computer show up in potential choices. Pick it and sync – you’re all set.
From there, you have to then map your layout to your software of choice, like I mentioned in 4 Easy Steps To Adding A Tablet Controller To Your DJ Set-up. It’s a bit of work, but it’s not much harder than mapping a physical Midi device.
I hope you’ve found this inspiring, and if you’d like it explained to you in a video, I’ve made one of those too. Have fun!
Video
Has this mini-series tempted you to have a go at designing your own tablet DJ controller? Can you see yourself incorporating an iPad or similar into your DJ sets with something custom built by you? Have you already tried it? We’d love to hear your thoughts in the comments.

D-Jam