


In this week’s instalment of our ongoing “Your First Day With…” series, we get our hands dirty with Serato DJ. As in the previous article for Virtual DJ 8, we show you how to get the software up and running on your computer, how to get your music library onto it, and how to hook up your controller so you can get on with DJing! Serato is known to be one of the simpler DJ apps to set-up, but it still has some idiosyncrasies all its own, so if you’re still unsure of how to make it work on your system or if it’ll work with your controller, then this article is for you.
Serato DJ vs Serato DJ Intro (vs Serato Scratch Live, too!)
If you’re new to Serato’s ecosystem, you may be confused by the company’s numerous offerings. Let’s break them down for you:
Serato DJ
Serato DJ is the company’s current flagship software. It’s what replaced the aging Serato Scratch Live (more on that later), and can also be considered as the “full version” of Serato DJ Intro. This is the software that comes bundled with mid to high-end controllers like the Pioneer DDJ-SX/SR/SZ, the Numark NS7II, and the Reloop Terminal Mix 8. To see the full list of controllers compatible with Serato DJ, click here.
Serato DJ Intro
Serato DJ Intro is the “lite” version of the company’s flagship software. It lets you use many of Serato DJ’s features, albeit in a less feature-laden, stripped down fashion. It’s usually bundled with less expensive controllers such as the Pioneer DDJ-SB, Numark Mixtrack Edge, and the Reloop Beatmix 4. To see the full list of controllers that are compatible with Serato DJ Intro, click here. Do note that you can upgrade to the full version of Serato DJ, which I totally recommend.
Serato Scratch Live

Serato Scratch Live was formerly the company’s flagship software for DVS (digital vinyl system) users. It has since been replaced by Serato DJ, which is now for all users. Sale of this software has been discontinued, and official support for it will cease after 2015. If you’re using Serato Scratch Live at the moment, you can upgrade to Serato DJ for free, provided the hardware you’re using is compatible with Serato DJ. If you want to know about the differences between Serato Scratch live and Serato DJ, click here.
Installation
- If you bought a controller that comes bundled with Serato DJ or Serato DJ Intro, go ahead and install it using the CD that came with your package. If yours didn’t come with a CD (or you don’t have a CD drive on your laptop), download the Serato DJ installer or the Serato DJ Intro installer from the Serato website. Always remember to choose the proper installation file that matches your computer (Tip: You’re using a Mac if you see an Apple icon on the upper left of your screen. If you’re on a PC, you’ll see a window icon on the lower left of your screen.)
- Once you’ve downloaded it, go to your “Downloads” folder and double click on the Serato DJ/Intro installer. If you’re on a Mac, the file is called “Serato DJ X.X.X.dmg” (Serato DJ Intro X.X.X.dmg if you’re installing Serato DJ Intro. the X’s will be number depending on the current version
- If you’re using a PC, the file will be “Serato DJ X.X.X.zip” (Serato DJ Intro X.X.X.zip if you’re installing Serato DJ Intro). This is a ZIP archive, so double click it to see its contents. You should be able to see a file called “Serato DJ X.X.X.exe“. Once you’ve opened the installer, allow it to “Run” when prompted. If you’re on a PC, choose the “Typical” set-up type when you are prompted to do so
- For Mac users, just double click on the installer file. A new window pops up with the Serato DJ/Intro icon, which you just drag to the Applications folder beside it. Done!

For the rest of this article, I’ll be referring to both Serato DJ and Serato DJ Intro as “Serato DJ”.
Connecting your DJ controller

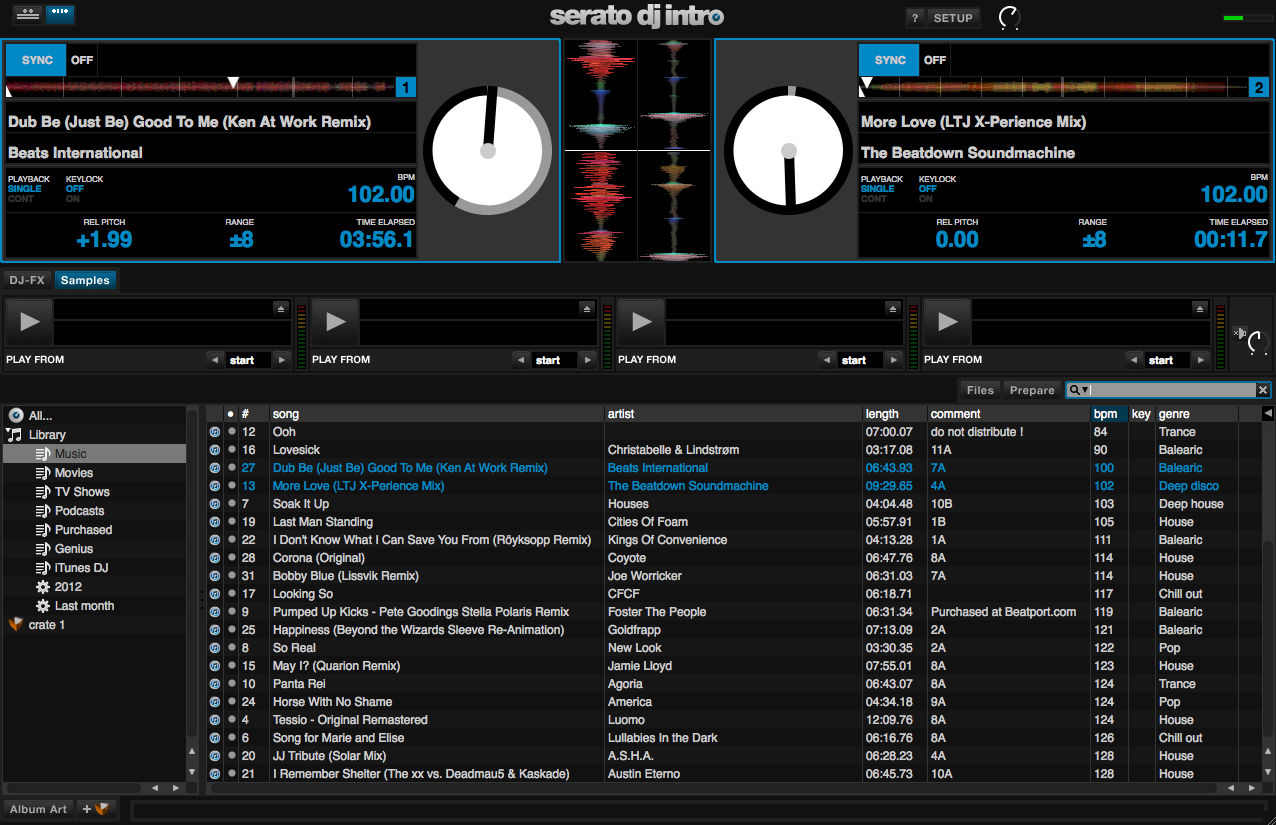
To be able to mix with Serato DJ, you need to connect your DJ controller when using it. Although it’s possible to use the app without a compatible device connected, you’ll only be able to play one track at a time, and the interface looks a little bit different from the usual Serato DJ interface. This is meant more for library organisation, playlist creation, and track preview instead of an actual DJ performance.
- Connect your DJ controller using the supplied USB cable. Plug one end to your laptop’s USB port and the other in your controller’s
- If your controller comes with a power adapter and requires it for use, connect that as well to ensure proper functionality. When in doubt, consult your DJ controller’s manual
- If it hasn’t power up already, turn your controller on by pressing/flicking its switch. Again, consult your controller’s manual if you’re unsure how to do this
- Connect your controller’s main outputs to your speakers
Creating an account and activating Serato DJ

Now that you have the software installed and your controller hooked up, create a My Serato account so you can activate your software as well as any plugins and add-ons that may be available to you.
- Launch Serato DJ by double clicking on its icon on your desktop. If you’re on a Mac, you can find the icon in the Applications folder.
- Once the app has launched, click on the “Buy/Activate” button on the lower right side of the screen.
- Enter your e-mail address and click Continue. You’ll then be asked for a password, so go ahead and fill that out and submit.
- Click on the “Activate” button to activate Serato DJ on your computer.
- You can check if you have add-ons available to you by clicking the “Expansion Packs” tab, where you can activate them. You can also purchase packs here, such as extra FX. Do note that this isn’t available to you if you’re using Serato DJ Intro.
In use
One of the things that DJs love about Serato DJ is that getting it up and running takes a minimum of fuss. If you see some tracks in your library, go ahead and drag them onto one of the virtual decks and press the play button on your controller. You can probably hear something by now (remember to set your crossfader in the middle and your volume faders up!), but it’s also important to make sure that your music library is properly set-up and recognised within Serato DJ.
Getting your music onto Serato DJ
Let’s get your songs loaded onto Serato DJ. As in the Virtual DJ 8 article, there are three ways to do this: You can drag and drop from within Serato DJ’s browser, from the iTunes tree within Serato DJ, or by dragging a song from the Finder window (Mac) or Windows Explorer (PC).
- Browser – On the lower left side of the screen you’ll see a window with a list of folders (eg All, All Audio, All Videos, etc.). This is the browser list, and clicking on any of these folders populates the window in the middle of Serato DJ’s screen with songs that are contained within that folder. This lists all the audio and video files that Serato DJ sees on your hard drive
- iTunes – At the bottom of the browser you’ll find a folder called iTunes. This is where all the playlists and music you have stored in iTunes resides, which is good news if that’s what you use to organise your music because you can just choose songs from this list as if you were picking within iTunes
- Drag & drop – You can also just drag a song from your hard drive (Finder for the Mac, Windows Explorer for the PC) onto any of the virtual decks located at the top of the Serato DJ screen

I suggest analysing tracks in your library so that Serato DJ can set beat grids, determine BPM, and assign other attributes to your songs ahead of time. While on-the-fly analysis during DJ sets don’t really take up much system resource, doing all of this before you take to the stage is a crucial part of preparation and can certainly help in a pinch when you’re looking for a track at the last second. To do this, disconnect your DJ controller to activate its offline player screen, and then click the “Analyze Files” button at the top of the browser window, making sure that the “Set Beat Grid” and “Set Auto BPM” options are ticked.
Your first mix
Let’s play some tunes! Drag a song from the browser window onto the left virtual deck of Serato DJ. You’ll see the song’s name appear on the deck, and you’ll see a waveform appear in the middle of the screen. Move your controller’s crossfader to the left, make sure the volume fader is all the way up, and hit the play button on your controller. You should be hearing the song playing back through your speakers.
Do the same thing for the right deck: Drag a song from your browser onto it to load. With the left deck playing, move the crossfader all the way to the right; notice how the volume of the song that’s currently playing begins to dip until it’s silent. With your right volume fader all the way up, hit the play button on the right deck of your controller. You’re now playing the song that you’ve loaded onto the right virtual deck after you faded out from the song on the left: In other words, you’ve just executed your first mix!
Stacking waveforms

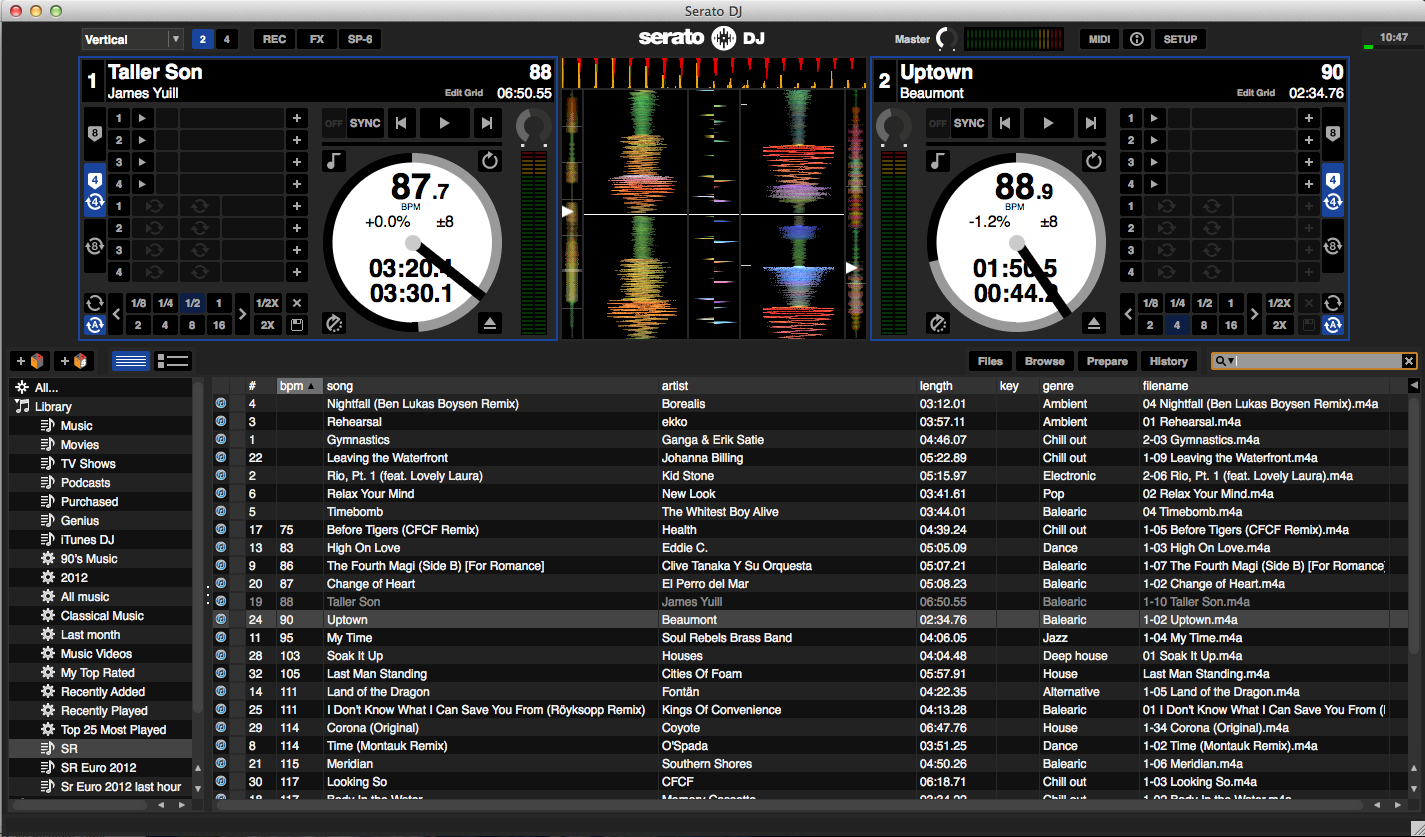
Serato is famous for its “stacked waveforms”, letting DJs get a look at how one song’s waveform looks alongside another, which is a huge advantage for digital DJs when they mix as it’s possible to see if both songs (or four of them, if you’re using a four-deck controller) are “on time” and in sync. You can change the orientation of the waveforms as well as the information displayed by Serato DJ by choosing from any of the four interface options available.
To do this, just click on the button on the upper left drop-down menu (it’s set to Vertical by default), and take a look at the other display options.
Trying out Serato Video

The latest version of Serato DJ comes with a demo version of Serato Video, an add-on that lets you manipulate video while you perform. To enable it, check the following steps:
- Click the Setup button on the upper right of the Serato DJ interface
- Click the Expansion Packs tab
- With Serato Video highlighted, tick the “Enable Serato Video” box. This opens up a menu below it
- Click the “Demo” button to begin your trial of Serato Video. You’ll see a box pop up that says “Demo Mode”. This is the Serato Video screen where your visuals will be displayed. The “Demo Mode” watermark disappears when you decide to purchase the plugin
- Exit the Setup screen
Now that we have Serato Video enabled, let’s try adding some visuals to our music!
- Head on over to the I Love QC website to download some free visuals
- Click the “Download I Love QC Pack” on the right side of the screen. Enter the same e-mail address that you used for your My Serato account. Click “Continue”, and your download should automatically start
- Unzip the file in your Downloads folder. You’ll see that it contains five visuals in the “.qtz” file format
- Enable Video by clicking on the “Video” button at the upper left side of the screen. You’ll see a row appear beneath the virtual decks. This is the Serato Video interface
- Drag the file “ILQC Ice Lines.qtz” onto the left box, and drag a song onto the left virtual deck. Hit play
- Your visuals move in time to the beat!
Conclusion

Goodness, that was a lot covered for our first day with Serato! By now you have Serato DJ installed on your computer, and you have it playing nicely with your DJ controller. You also have your music and iTunes library accessible from within Serato DJ, and you’ve even had a taste of what it’s like to DJ with visual support thanks to the demo version of Serato Video, so go ahead and start DJing!
If you’re a DJ who’s just starting out, why don’t you check out our How To Succeed At DJing series? It’s part of our free training programme, and one you should definitely check out if you want to maximise your chances of DJ success. We also have a series of training articles about getting started with VJing, so check that one out as well.
This week’s video
Check out the other parts in this series:
- Your First Day With: Virtual DJ 8
- Your First Day With: Traktor Pro 2
- Your First Day With: Rekordbox 3.0
What challenges did you struggle with when setting up Serato DJ for the first time? We’d like to know if we missed anything, so go ahead and let us know in the comments below.

Joey Santos


")
