

Modern DJ gear is pretty complex. Sure, the basics of DJing haven’t changed since turntables, but there is so much more you can do with modern software, controllers, and media players.
Indeed, here at Digital DJ Tips we spend a lot of time teaching our students how to use advanced features like loop roll, slip mode, performance pads, built-in samplers and so on, especially in our advanced Digital DJ Lab training. And it’s absolutely true that once you’ve mastered the basics of DJing, these are the things you’ll have so much fun moving on to next.
On your marks, get set…
But what of the more fundamental gear settings? The “set and forget” options offered to you by modern equipment and software?
These settings have a fundamental affect on what your gear feels like to use, however you choose to use it. They can be crucial in making the gear behave how you want it to behave, which then makes everything else easier. You should absolutely be considering these, right from the start with any DJ gear.
Discover the brand-new way to learn DJing: The Complete DJ Course
Yet many people never discover these settings, or just assume the defaults are OK. This can often be a mistake, forcing you to live with things that would be so easy to change. With just a little work you can fine-tune your gear to behave exactly how you want it to behave when DJing. So in this article, I’ll go through a few of the more common settings options, that you’ll find on nearly all gear.
What’s available to you will vary slightly depending upon what gear you have – but I bet there’s something here you haven’t thought of, and that you could change to improve how your system is set up for the way you DJ.
5 Settings To Take A Look At
1. Latency
Latency is a setting in all DJ software. It describes how long the gap is between you doing something on your controller or keyboard, and the results of that thing being audible through your speakers or headphones.
Set the latency low, and everything will feel snappier and faster… until the computer can’t cope, and you get video and even audio glitches or worse. Set it higher, and the computer won’t be pushed as hard, but you may well begin to “feel the lag”.

Most people leave this setting where it is, unless they experience performance problems with their computer – in which case they finally figure out that this may be causing the issue, and increase the latency.
But there’s no reason not to find the latency setting on your software and reduce it, to see if your computer can cope. As long as you are careful to optimise your computer for DJing, you may well be able to improve the performance of your software, making DJing more fun forever on your set-up.
Just move the slider down, until you reach a setting where the computer is obviously struggling to cope (broken up audio, jumpy software, and so on), then move the slider up a notch from there. That is usually the right place to get the best performance out of your particular set-up.
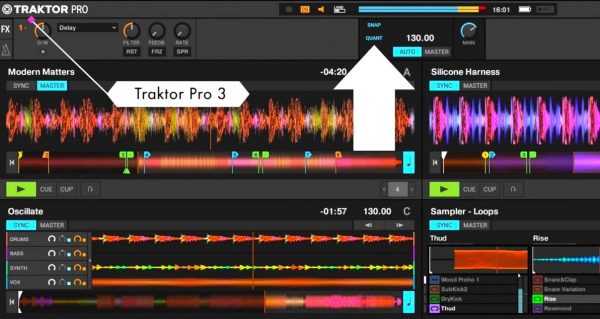
2. Quantise
Quantise is a function whereby the software or DJ system looks at an action you’ve taken, such as setting a cue point or triggering a loop, and then looks at the beats on the track, and adjusts your action to line up with the nearest beat.
(Actually, whether it lines up with the nearest beat, quarter beat or whatever is up to you – this is one of the options you have when configuring quantise.)
The advantage of this is that it keeps everything in time. If you’re a little bit early or late triggering a cue point or loop, or dropping a new track in, or switching on a delay effect, quantise “tidies up” your handiwork, keeping everything sounding neat and tidy.
Whether you choose to use this is of course your call. Some DJs love it, but others (especially those brought up with vinyl DJing) despise it. If you do choose to use it though, you need to set two things: what it “snaps” to (the nearest full beat, half beat, quarter beat?) and – crucially – the beatgrids on your tracks.
Watch this next: How To Beatgrid Tracks In Rekordbox
The latter is important, because quantise can only work if it knows where the beats are on your tracks, and for that, your tracks need to be properly “beatgridded”, which describes the process of analysing the BPM and beat structure of a track. It’s usually done automatically and accurately by your software, but some tracks require manual intervention. If you want to DJ with quantise on, you’ll need to be sure all your tracks are correctly beatgridded.
3. Hot cue behaviour
Modern DJ gear has “hot cues” – points you can set on tracks that you can immediately jump to, usually via “performance pads”. Setting hot cues makes it easy to move around in your tracks while they’re playing, effectively live remixing your music. They’re powerful and widely used.

But they are not implemented the same way by default in all systems. In some DJ systems, if a track is not playing, pressing a hot cue will move to that hot cue and the track will remain “not playing”, but if you do the same thing when the track is playing, the track will jump to the hot cue and play. With other systems though, when you press a hot cue the track will always play, regardless of whether the track was playing or not when the hot cue was pressed.
Watch this next: Two Serato DJ Hot Cue Essentials Beginners Must Know
Both approaches have their fans, but the point is that you usually don’t have to stick with the way your system is set up. There is normally an option to switch to the “other” way of working. It may be called “hot cue gate” or something similar in your settings, but whatever it’s called, if you feel like your hot cues aren’t behaving how you want, you should try the other way and see if that suits you better.
4. Sync type
Love it or hate it, “sync” – the one-button method of lining up the beats of your tracks – is here to stay. But there is more than one type of sync, and you should definitely be aware of how sync is working on your system, so you can make an informed choice as to whether it’s doing what you want it to.
When we teach beatmixing here at Digital DJ Tips, we divide it into two parts:
1. Tempo matching – getting the speed of the two tracks the same
2. Beatmatching – lining up and locking the beats of those tracks once we’ve got the tempo matched
Guess what? Most sync systems give you the choice whether you want sync to do both of the above, or just the first task.

If you’re used to DJing with vinyl, for instance, but you realise it’s actually pretty useful to have the system get your tracks to the same speed for you, you may be happy with just the first type of sync, leaving you free to manually line up the tracks’ beats and keep them in time yourself, just as you’ve always done.
But if you’re a “digital native”, with no interest in keeping tracks lined up manually as you DJ, you’ll certainly want to go for the second, “full” type of sync, where the system does it all for you, leaving you free to do other things, like add effects, extra decks, use the performance pads and so on. Again, just like with quantise above, this does depend on accurate beatgrids.
Read this next: Is Using Sync When Making A Mixtape Cheating?
Both “ways” of DJing are fine – but what wouldn’t be fine would be attempting to DJ one way while your sync is set the other! So do take the time to understand how sync works on your particular system, and how to toggle the options. It may be a single/double tap on the sync button, or a particular setting in the menu, but however it works, do learn how to trigger the sync type that works for you – if you use it at all, of course.
5. Pitch range
On a classic Technics turntable, the slider that lets you adjust the speed of the track will slow it down or speed it up by 8%. You don’t get a choice.
But on most modern DJ gear of all types (including modern turntables), you do get a choice – from 4% sometimes up to 100%! And this is one setting it is definitely worth experimenting with to find a range that works for you.

The advantage of having a wider pitch range set is that you can manually beatmix music at much wider tempo ranges. Another advantage is that you can alter the tempo when tracks are synced together over wider tempo ranges by using the pitch sliders. And yet another advantage is that you can perform drastic DJing tricks with the tempo sliders (a favourite of battle/competition DJs in their routines).
But there are disadvantages. The wider you set the pitch range, the less accurate the control becomes. A short, cheap pitch fader, of the type fitted to entry level DJ controllers, is not going to give you BPM accuracy down to, say, a hundredth of a BPM, if its total “travel” distance is only a few inches, and you have the tempo range set to 100%. If you like to beatmix manually, this is an issue.
And also, with the range set too wide, you may go in for a small tweak to tempo, only to accidentally throw the whole mix out by a much larger, instantly noticeable amount.
Watch this next: DJ Trick For Manual Beatmixing in HALF The Time!
So how you set this will depend upon how you DJ, the range of BPMs you play within (which will be determined by the genres you play), and – frankly – trial and error. Also, this is one setting you may want to adjust every now and then, maybe to suit a particular style of a set, or when performing particular transitions within a set.
Best practice is to figure out how to alter this, and also to know how to check what it is currently set to while DJing, so you don’t use the pitch control expecting a small tweak only for it to throw your whole mix out, or conversely, for the control to do nothing because it isn’t moving even close to the BPM of the “other” track when you adjust it.
Finally…
There are lots of other settings it’s worth investigating, many of which are software specific – which is why if you use Serato, Rekordbox or Traktor, we have courses to teach you all the ins and outs of your particular program.
DJ like the pros with our training: The Complete DJ Course
But whatever your platform, it is definitely worth seeing these things out. And while you’re there, why not also look to tweak things like font size, key display format, waveform zoom and orientation, library columns, and jogwheel settings?
Remember, there is no “right” way to set these things, and whatever you choose can be changed – so don’t be scared to set them in a way that makes sense to you, right now.

Phil Morse


")

")