


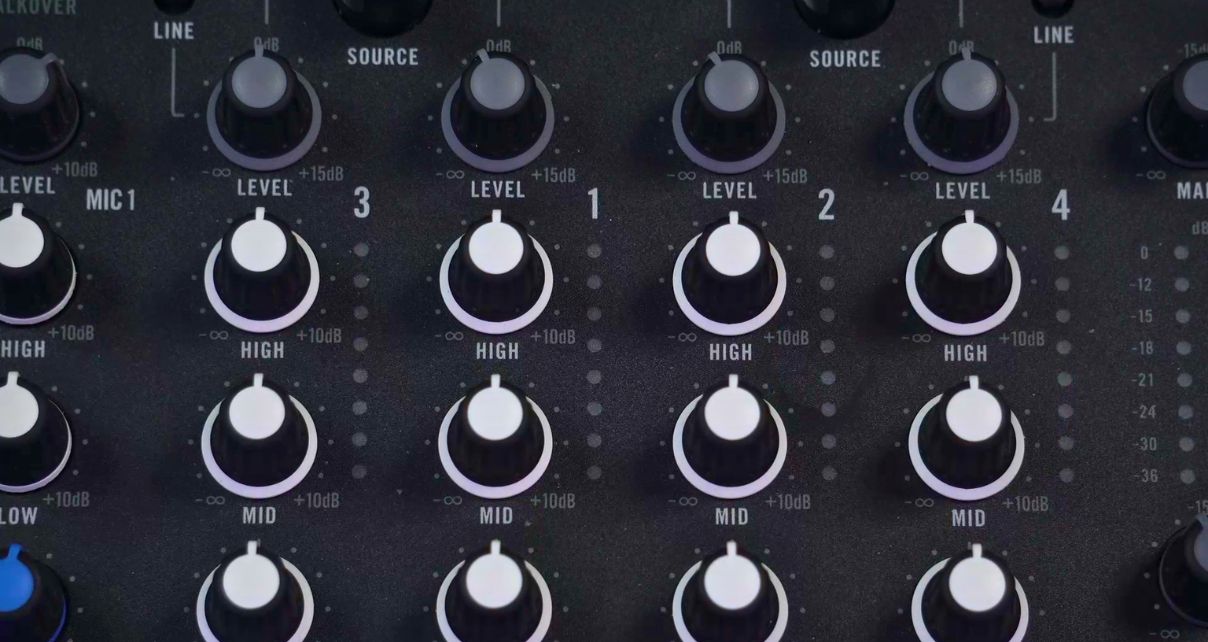
The gain controls on your mixer – also called trim or level – sit right at the top of each channel. Most controllers have them, yet loads of DJs never touch them. That’s a shame, because understanding what they do and getting into the habit of using them will make your mixes smoother, give you more creative options, and keep your transitions sounding polished.
What gain controls actually do
To understand gain on DJ gear, it helps to think about where the concept comes from: recording studio mixers. Those big desks have 24 channels or more, each handling a different input – a kick drum, a cymbal, a vocal, a synth. The volume differences between those sources can be huge, and the gain control’s job is to bring every input to the same optimal level before anything else in the signal chain touches it.

Once the input is at the right level – nice and loud, but not distorting – everything else works properly. Your EQs respond as expected, your effects sound right, your faders behave predictably, and when you mix two sources together, they balance. It’s exactly the same on DJ gear.
“I just leave mine at 11 o’clock”
You hear this a lot, and if you’re only mixing recent tracks from the same genre, you might get away with it. Modern productions are mastered to within an inch of their lives, so the levels are often similar enough. But as soon as you introduce a different source – a microphone, another DJ’s controller, a turntable, or just an older MP3 that wasn’t produced with the same loudness standards – things fall apart.
Pushing all three EQ bands up or cranking the master volume both create more problems than they solve. Either way, there’s a more obvious fix: load a track, skip to the loudest part, hit play, and adjust the gain so the meters peak into the orange but not the red. The channel is now set for that track – it can’t distort, but it’s as loud as it needs to be.
Sign up to Tuesday Tips
 Free newsletter
 Your weekly digest of the latest training, gear reviews, industry news, and exclusive tips and tricks to help you stay ahead in your DJing.
We collect, use and protect your data in accordance with our Privacy Policy.
Three Gain Control Tips
Most DJs who use their gain controls stop at the basics – set it when a track loads and leave it alone – but in doing so, they’re missing out on some of the most useful things these controls can do. Here are three techniques worth adding to your workflow:
- Set your gain every time you load a track – Most DJ software has an auto-gain function, but what happens when you bring in a CDJ, a turntable, a mic, or the output from an effects unit? You need the habit of checking and setting the gain for every new input. Load a track, find the loudest section, set the gain so it peaks into the orange – every single time
- Gain-stage your stems and loops, too – This is becoming more relevant now that stems are a thing. Say you’ve isolated a vocal, looped a short section of it, and want to layer it over another track – that isolated vocal is going to be much quieter than the full track, your meters will barely move! Turn the gain up until it peaks properly and you’ve got a full-volume element you can actually work with. Just remember to turn it back down before you bring the full track in. Your gain controls don’t all have to sit at 11 o’clock – if the thing coming through the channel is a quiet stem loop, push the gain up. That’s what it’s there for
- Use gain to rescue fading tracks – I use this one all the time playing open format sets with three-minute pop songs. Loads of tracks end with a fade-out, and that can catch you out mid-transition: you’ve got a nice beatmix going, but the outgoing track starts disappearing from underneath. As it fades, turn its gain control up to compensate – you’re keeping it at the same perceived volume, which buys you a few extra seconds to complete the transition smoothly. It’s a small thing, but it’s one of those techniques that separates a good mix from a great one
Finally…
Gain controls are pretty straightforward, but they’re also one of the most useful tools on your mixer. Set them properly every time you load a track, use them when working with stems and loops, and remember they can bail you out when a fading track threatens to ruin your transition. Once you start using them deliberately, you’ll wonder how you ever ignored them.
Read this next: How DJs Use “Fader Cuts” To Elevate Their Sets
How to set up your mixer, use your EQ, and get the best sound out of your gear: all of that is covered in detail inside Rock The Dancefloor!, our book on how to DJ the modern way. We’d love for you to have a free copy on us – just click here to grab it. And if you’re ready to go all in on your DJing, grabbing an All-Access Pass gives you lifetime access to every course we make – now and in the future – giving you a complete, structured DJ education for life.
What are your tips for using gain controls? Any favourite techniques? Let us know in the comments below.

Phil Morse


