


Digital DJing has opened the art to millions, but as with all new hobbies, the very first few steps can feel truly daunting – especially so when you have to learn how to use new software and hardware alongside trying your hand at DJing skills for the first time. That’s where this new “Your First Day With…” series aims to help: It’s aimed squarely at first-time digital DJs who are just getting their hands on a particular software.
In this first article, we shine the spotlight on one of the most widely used DJ apps on the planet: Virtual DJ 8. We show you everything you need to know to set it up on your computer, how to get your tunes in, and how to use it with and without a controller so you can get rocking right away! No detours, just a straight up guide to get you started now.
Free vs paid
Before we begin downloading and setting up Virtual DJ 8, let’s quickly discuss the differences among the different versions: The free “Home User” version, and the paid “Advanced Home User” and “Professional User” licences.
Free
The “Home User” version can be downloaded from their website and used free of charge for as long as you want. This is so you can get a taste of Virtual DJ 8, “provided you don’t use it for professional purposes” (ie you don’t make money off of using it while you DJ, although heaven know how they’d check or know). There’s also a 10-minute trial period wherein you can connect and use a DJ controller you have each time you launch Virtual DJ 8, which is a great way to check how your device works with the software before committing to purchase it.

Paid
Advanced Home User
The “Advanced Home User” licence grants you full use of a single DJ controller without any time restrictions. The price for this licence varies from US$49 to US$199, depending on what controller you have. I highly recommend checking out this page on their site to determine how much it costs for your controller. Do note that if you plan on earning cash from DJing with Virtual DJ 8, you’re still not meant to do that with this licence as that is considered “professional” use of it.
Professional User
For mobile DJs, club DJs, or folk who will be earning from performing with Virtual DJ 8, the “Professional User” licence is what’s needed. This grants access and full use of all present and future DJ controllers, and is also the only option that lets you create your own custom mappings for controllers that don’t work with Virtual DJ 8 straight out the box.
There are two different kinds of Professional User licences: Pro Infinity, which is a one time payment of US$299, or the Pro Subscriber, which is a monthly payment of US$19 . This nets you all the benefits of a professional use licence along with access to all controllers.
Personally, I think the US$19 is a great value if you plan on taking your controller and Virtual DJ 8 out for bar gigs and the like, and it’s the licence that I suggest you get if you want to DJ with a controller, especially if you’re undecided as to what controller you’re planning on purchasing in the near future.
Installation

- Download an installation of Virtual DJ 8 over at their website. Remember to choose the proper installation whether you’re using a PC or a Mac, as they aren’t interchangeable. (Tip: You’re using a Mac if you see an Apple icon on the upper left of your screen. If you’re on a PC, you’ll see a window icon on the lower left of your screen.)
- Once you’ve downloaded it, go to your “Downloads” folder and double click on the Virtual 8 installer. If you’re on a Mac, the file is called “install_virtualdj_osx_v8.0.1910.pkg”. If you’re on a PC, the file is “install_virtualdj_pc_v8.0.1872.msi”. You can also find it on the lower left of your browser window.
- Once you’ve opened the installer, allow it to “Run” when prompted. If you’re on a PC, choose the “Typical” set-up type when you are prompted to do so.
- For Mac users, just click “Continue” when prompted. After the succeeding menus, click on the hard drive icon where you want to install, and click “Continue”. Proceed to install Virtual DJ 8.
Creating an account
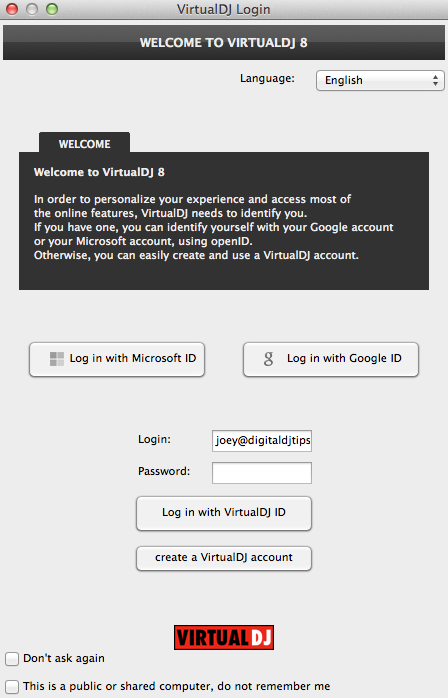
Now that you have Virtual DJ 8 installed on your computer, it’s time to create a Virtual DJ account. Follow these steps to get it configured right the first time.
- Double click the Virtual DJ 8 icon on your PC desktop. If you’re on a Mac, click Finder, go to the Applications folder, then double click on the Virtual DJ 8 icon
- Upon first launching of the app, you’ll be greeted with a login window. Look at the bottom of the window and click “Create a Virtual DJ account”
- Fill up the fields and hit “Create my account”. This lets you access Virtual DJ 8’s online features
Setting up
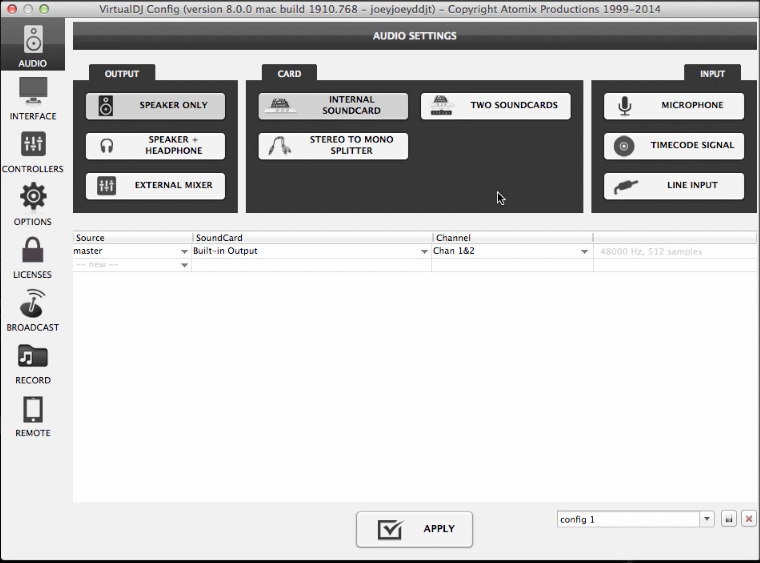
Now let’s go set up our sound card to make sure it’s enabled. Go ahead and click on the Settings button at the upper left of the screen (it looks like a gear/cogwheel). If you’re just using your onboard sound card, Virtual DJ 8 will default to this already, called “Internal Sound Card”. If you’re using an external sound card, it’ll show up here too, so just go ahead and choose that one.
In use
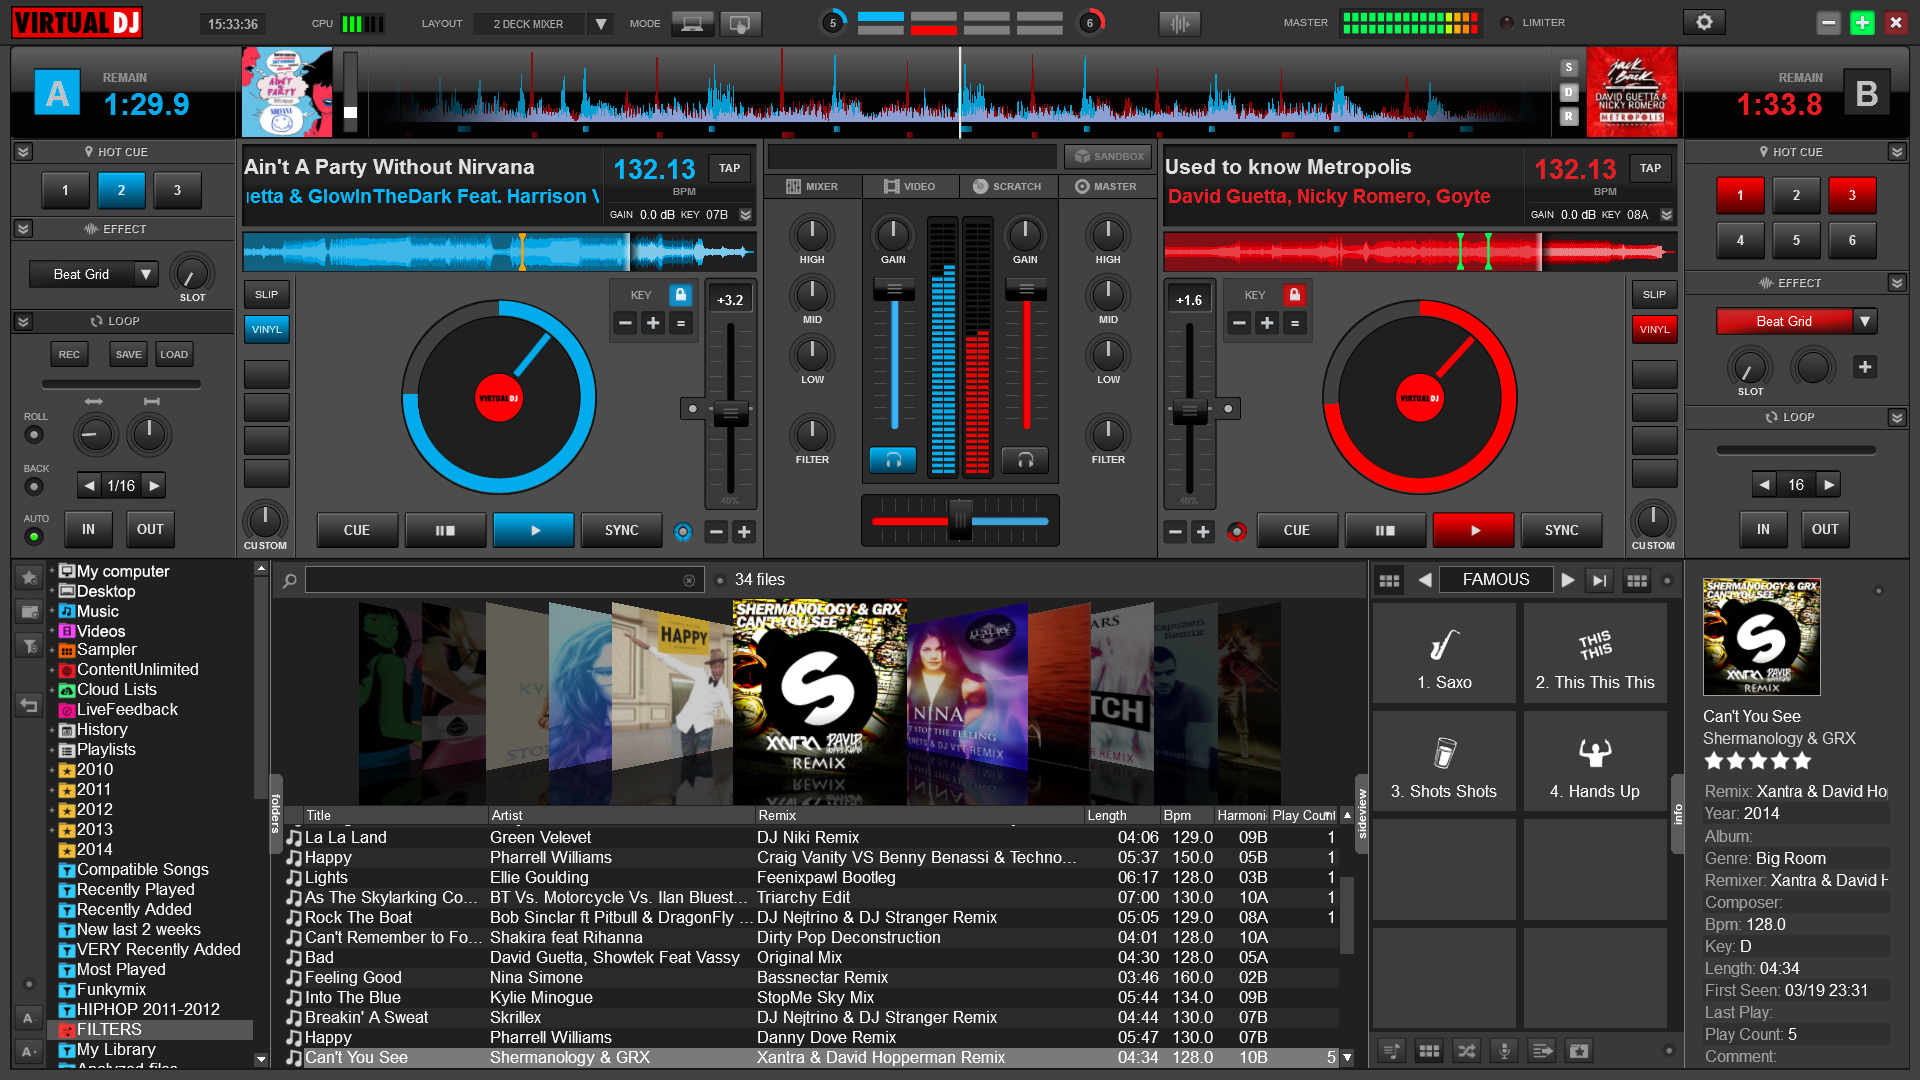
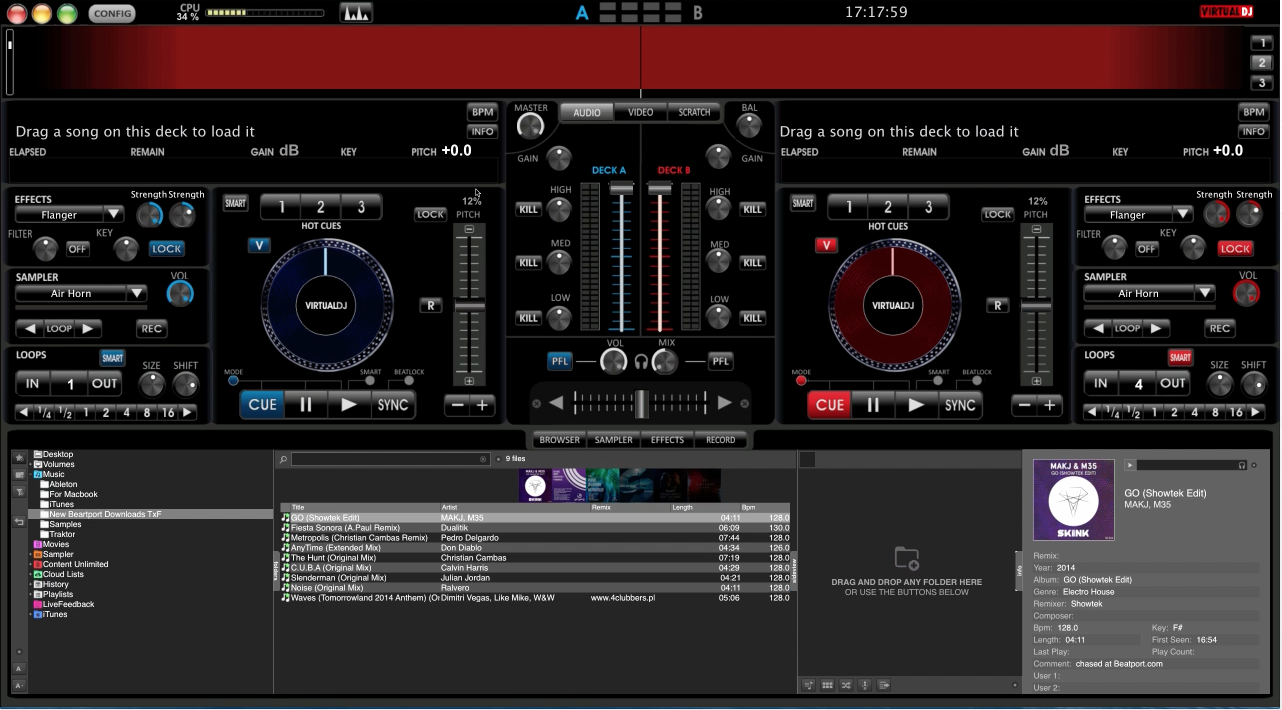
We’re done with all the set-up procedures, so let’s go take Virtual DJ 8 for a spin with some of our tunes! There are three ways you can select music to play on your virtual decks: from the Folders list, from iTunes, or by dragging a song from the Finder window (Mac) or Windows Explorer (PC).
- Folders list – On the lower left side of the Virtual DJ 8 interface you’ll see a window with a list of folders (eg Desktop, Volumes, Music, Movies, etc.). This is your Folders browser, and it lists all the music folders and playlists within Virtual DJ 8 and on your hard drive
- iTunes – At the bottom of the Folders list, you’ll find a folder called iTunes. This is where all the playlists and music you have stored in iTunes resides, which is good news if that’s what you use to organise your music because you can just choose songs from this list as if you were picking within iTunes
- Drag & drop – You can also just drag a song from your hard drive (Finder for the Mac, Windows Explorer for the PC) onto any of the virtual decks located at the top of the Virtual DJ 8 screen

I recommend analysing songs that are in your Virtual DJ 8 library, as this allows the software to determine the tempo, musical key, and waveforms of your songs ahead of time. To do this, highlight songs within a folder, right click on your mouse, choose “Batch”, and then click “Analyse for BPM etc”.
Getting started
To quickly get started, click on the “Music” folder. You’ll see the centre window list songs that you have within that folder. Click on any one of them and drag to either the left or the right virtual deck at the top of the screen. To play a track in a deck, press the Play button. You can even play both decks at the same time, although this may sound undesirable because they aren’t beat matched yet!

To remedy this, take a look at the middle of the screen: You’ll see a grey rectangle flanked on either side with a red and a blue bar. This is the crossfader, which determines which deck’s audio is allowed to pass through to your master output. Dragging the crossfader all the way to the left plays the left deck and mutes the one on the right. Drag it all the way to the right, and the left deck gets muted while the right deck is heard in full. Reposition it in the middle and you hear both playing at the same time.
Using Virtual DJ 8 with a DJ controller
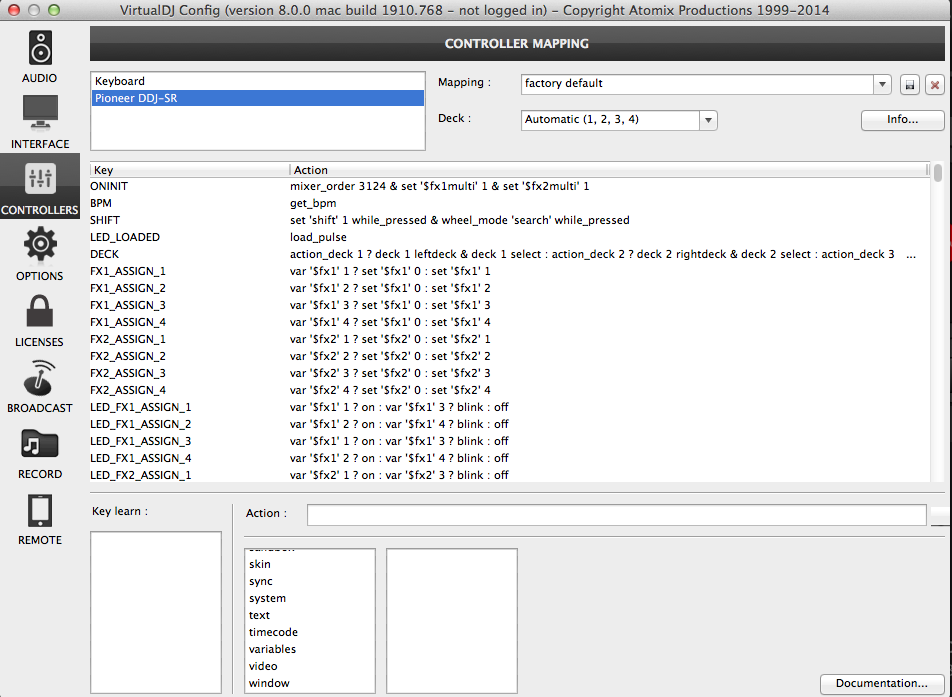
If you’ve got a DJ controller and you want to use it, I recommend checking this list and looking for your controller in it first before anything. The free Home User version lets you try out your controller, albeit with a 10 minute restriction. If you want to keep using it beyond that limit, either you restart Virtual DJ 8, or you purchase a licence.

For example you want to use it with a Pioneer DDJ-SR controller. Having checked the list of controllers (the licence costs US$149), you then have to purchase the “Virtual DJ 8 Plus Controller” licence over at the Buy page of the site. Alternately, you can also purchase a Pro Subscriber licence, which is a monthly renewable cost that lets you use it with all compatible controllers.
Provided that your controller is in the list of supported DJ controllers over at the Virtual DJ website, it’s a must that you ensure that you’ve installed any necessary drivers that come with your controller, particularly if you’re on a PC. One way to check if you’ve done this is that once you click on the Preferences page (the cog icon on the upper left of the Virtual DJ 8 screen), you’ll see your controller’s name in the “Controllers” menu.
Skins
Many people love Virtual DJ because of the many ways you can customise it to suit your DJ needs and taste. One fun way to make your copy of Virtual DJ 8 your own is by changing its default skin. The Virtual DJ community provides a repository for all compatible skins over at the site which you can find here. Do note that you’re going to have to own at least the Advanced Home Users Licence to change your skins, as this feature is disabled in the Free version.
Conclusion
If you’ve made it this far, give yourself a pat on the back: You’ve done it! You’ve got Virtual DJ 8 up and running, imported songs into its library and analysed them, and maybe even spun a track or two (or three or four!). Further, you now know the main feature differences between the free and paid versions, which will greatly influence two big decisions on your end: Will you use Virtual DJ 8 with a DJ controller? And if so, which one?
If you need a place to start, I recommend checking out our 2014 Controller Guide for a quick overview of all the DJ controllers in the market today. And if you’re now ready to start learning the fundamentals of DJing fast, go check out our How To Digital DJ Fast course.
This week’s video
Check out the other parts in this series:
- Your First Day With: Serato DJ
- Your First Day With: Traktor Pro 2
- Your First Day With: Rekordbox 3.0
What challenges did you struggle with when setting up Virtual DJ for the first time? We’d like to know if we missed anything, so go ahead and let us know in the comments below.

Joey Santos

![How To DJ Warm Up Sets [Live DJing Q&A With Phil Morse]](data:image/svg+xml;nitro-empty-id=NTE4OjEwOTE=-1;base64,PHN2ZyB2aWV3Qm94PSIwIDAgMTIwOCA2NDIiIHdpZHRoPSIxMjA4IiBoZWlnaHQ9IjY0MiIgeG1sbnM9Imh0dHA6Ly93d3cudzMub3JnLzIwMDAvc3ZnIj48L3N2Zz4= "How To DJ Warm Up Sets [Live DJing Q&A With Phil Morse]")


")